
Concealed Shower System Guide: Design, Size & Installation
Learn how a concealed shower system works, what a 200 mm rainfall head and 400 mm arm offer, plus installation planning, finish options, maintenance, and buying tips.
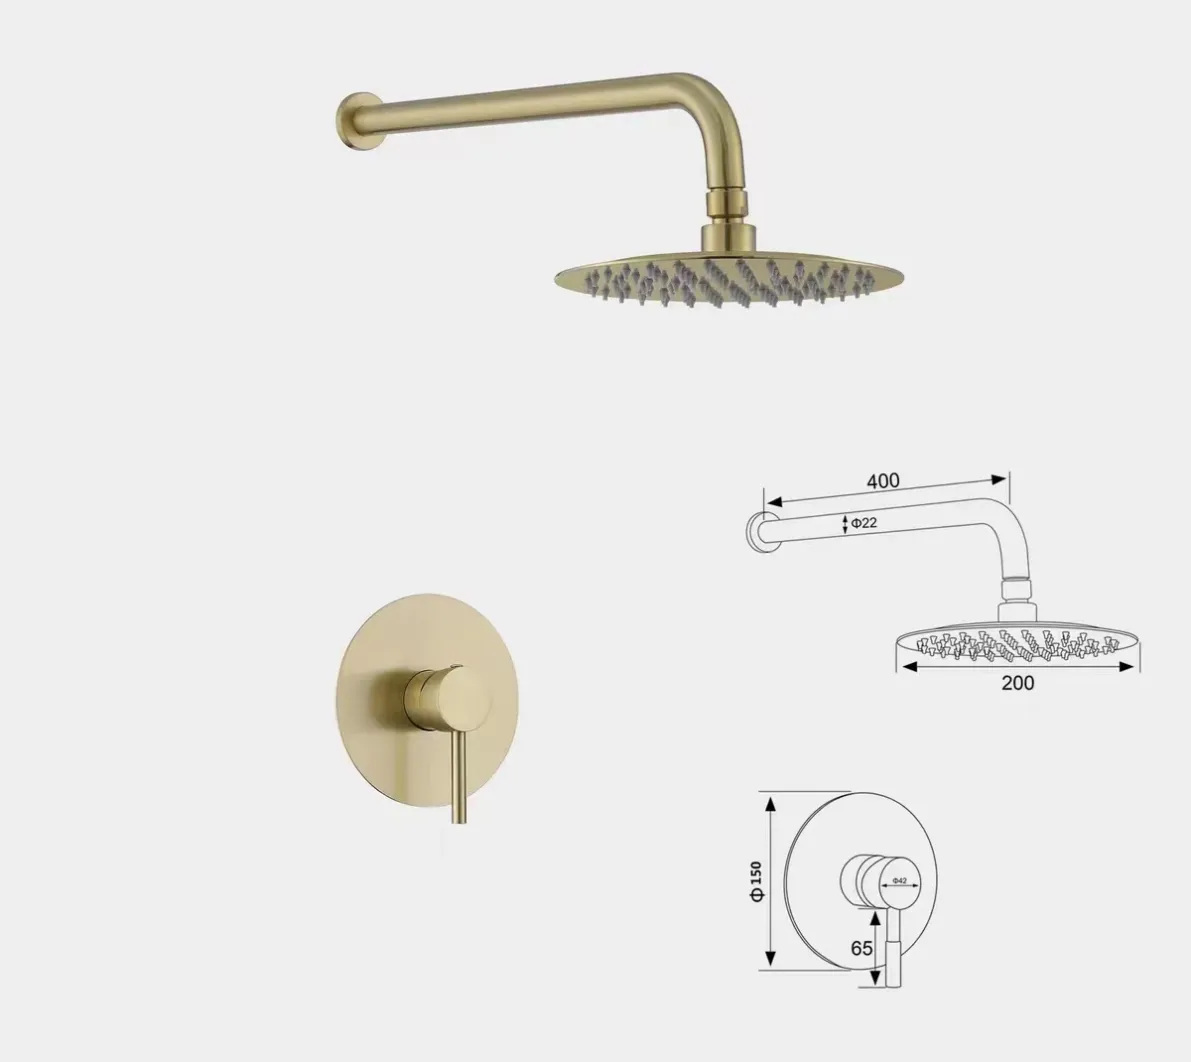
A concealed shower system is designed for bathrooms where clean lines, efficient use of space and a calm visual appearance matter. Instead of placing the mixer body and pipework on the wall surface, the working components are installed behind the finished wall. Only the rainfall shower head, wall arm, control plate and handle remain visible.
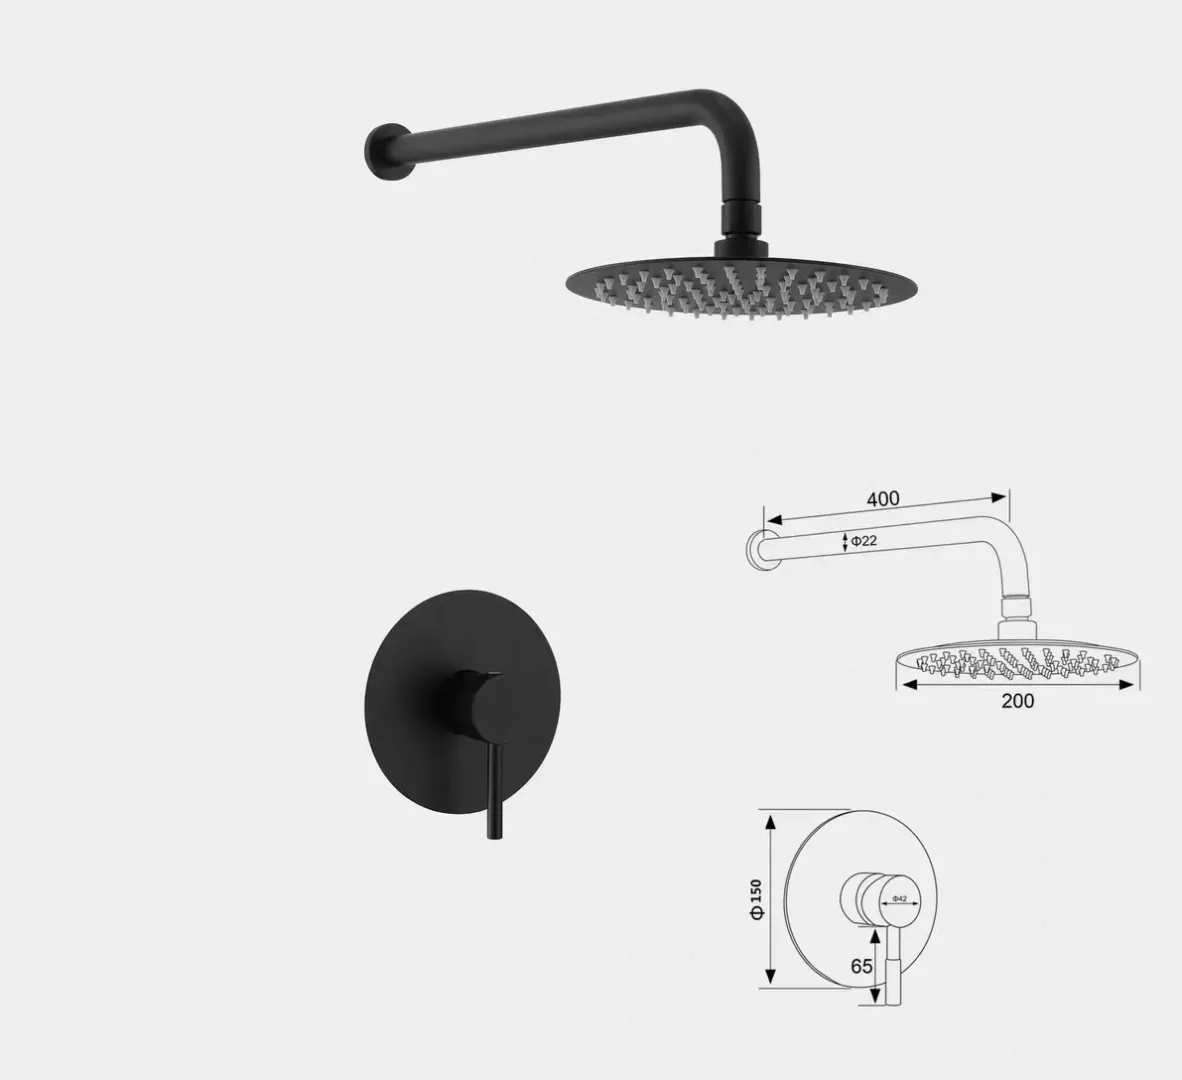
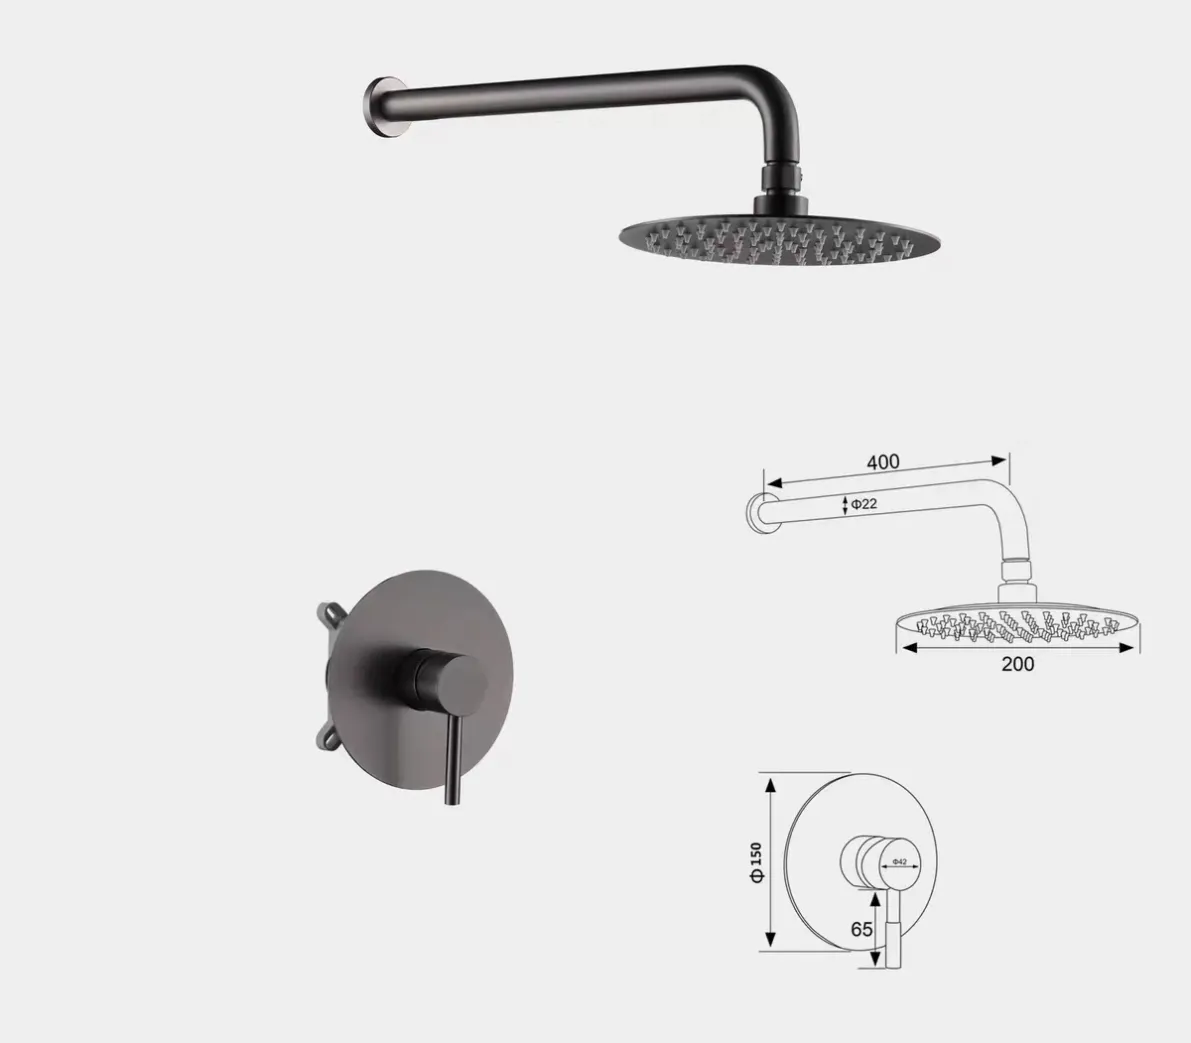
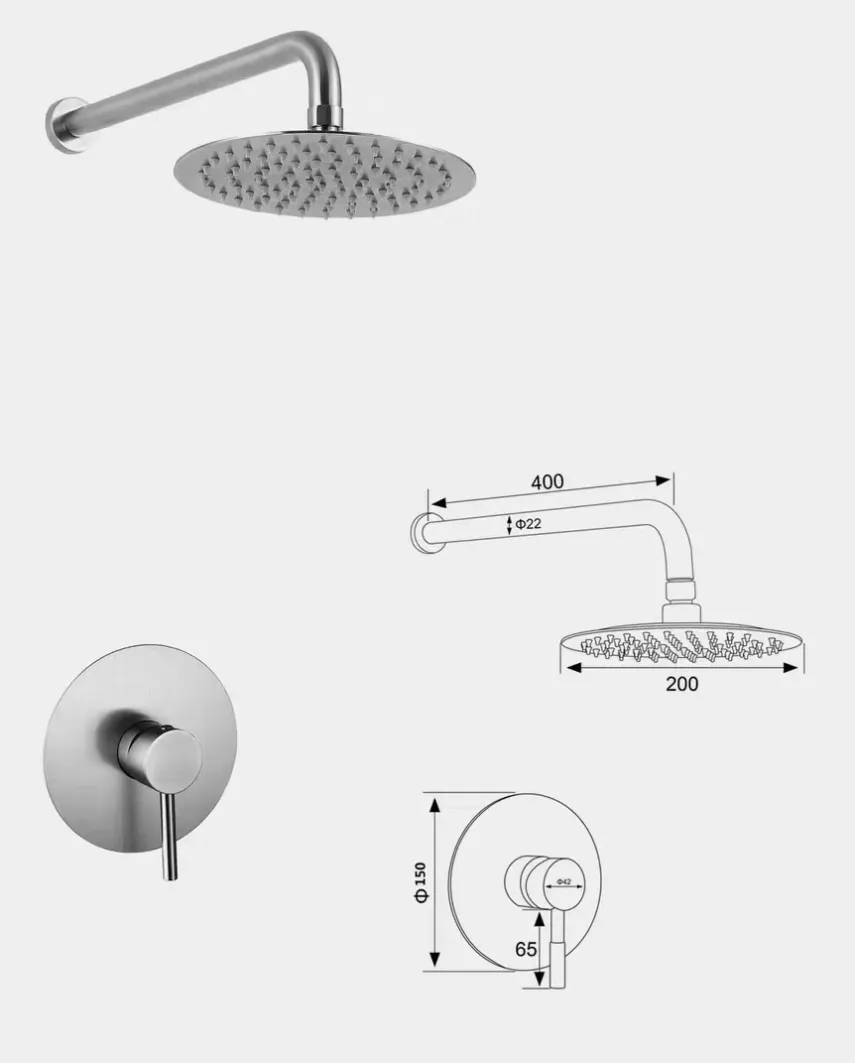
The system shown in these images combines a 200 mm round rainfall shower head, a 400 mm wall-mounted shower arm and a circular concealed control plate. The same minimalist form is presented in matte black, gunmetal and a bright silver-toned finish, making the design adaptable to different bathroom styles.
What Is a Concealed Shower System?
A concealed shower system places the valve body and water connections inside the wall. The visible trim is intentionally simple, while the hidden valve controls water flow and temperature behind the surface.
This configuration is different from an exposed shower set, where the mixer, riser and connections remain visible. Concealed installation creates a cleaner wall and can make a compact shower area feel more open. It does, however, require careful planning before tiling because the valve depth, pipe locations and finished wall thickness must all be coordinated.
Key Components Shown in the Images
200 mm Round Rainfall Shower Head
The round overhead shower measures approximately 200 mm in diameter. Its broad spray face is designed to distribute water across a wider area than a small standard shower head. The slim profile and evenly arranged nozzles support a modern, understated appearance.
400 mm Wall-Mounted Shower Arm
A 400 mm arm extends the shower head away from the wall so the spray can fall comfortably into the showering area. The technical drawing also identifies an approximately 22 mm arm diameter. Before installation, the position of the arm should be checked against the shower enclosure, ceiling height and the user’s preferred standing position.
Circular Concealed Mixer Control
The visible control uses a round faceplate of approximately 150 mm in diameter with a slim lever handle. The circular shape visually matches the rainfall head and keeps the design consistent. The concealed valve and connections sit behind this trim plate.
Coordinated Finish Options
The images present three finish directions: matte black, gunmetal and a bright silver-toned finish. Matte black creates strong contrast in light bathrooms. Gunmetal offers a softer, architectural look, while a silver-toned finish works well in classic and contemporary spaces. Actual finish names and coating specifications should always be confirmed before ordering.
Why Choose a Concealed Rain Shower?
Clean, Minimal Appearance
With most plumbing hidden behind the wall, the shower area looks less crowded. This is especially useful in modern bathrooms, hotel projects and smaller spaces where visual simplicity improves the overall room design.
Easy-to-Clean Visible Surfaces
Fewer exposed pipes and joints mean fewer external surfaces where soap residue and water spots can collect. Routine cleaning is focused on the shower head, arm, control plate and handle.
Flexible Bathroom Styling
The simple round geometry can coordinate with round basin faucets, towel hooks, mirrors and other bathroom fittings. Selecting the same finish across visible fixtures helps create a consistent design language.
Comfortable Overhead Showering
A 200 mm rainfall head provides wider overhead coverage while remaining compact enough for many residential shower spaces. Final performance depends on the building’s water pressure, flow rate, valve specification and plumbing design.
Installation Planning: What to Check Before Tiling
Concealed shower installation should be planned before wall finishes are completed. The following checks can prevent expensive adjustments later:
- Confirm the required installation depth of the concealed valve.
- Position the control at a comfortable operating height.
- Check that the 400 mm arm places the shower head inside the intended wet area.
- Coordinate pipe routes with wall framing, waterproofing and other services.
- Verify hot and cold supply orientation.
- Confirm that water pressure and flow are suitable for the selected rainfall head.
- Keep any manufacturer-required service access available.
- Complete pressure testing before closing the wall and installing tile.
A qualified plumber should install and test the system according to local plumbing and waterproofing requirements. Product-specific installation drawings should take priority over general guidance.
How to Select the Right Concealed Shower Set
Start with the visible design, but also review the hidden technical details. Ask the supplier to confirm the valve body material, cartridge type, connection standard, recommended pressure range, flow rate, finish process, warranty and availability of replacement parts.
It is also important to confirm exactly what is included. Some packages contain only the shower head, arm and trim; others include the concealed valve body and installation components. A clear packing list prevents compatibility problems at the job site.
For renovation projects, inspect the wall cavity before purchase. If access is limited, an exposed shower system may be easier to install. For new construction or a complete bathroom remodel, concealed plumbing can be coordinated early and integrated neatly into the wall.
Care and Maintenance
Wipe visible metal surfaces with a soft cloth after use to reduce water marks. Use mild soap and water rather than abrasive cleaners, rough pads or strong chemicals that may damage the finish.
Clean the flexible shower nozzles periodically to reduce mineral buildup. If water flow becomes uneven, check the nozzles and inlet filters before assuming the concealed valve has failed. Always follow the supplier’s maintenance instructions for the specific finish and cartridge.
Frequently Asked Questions
Is a concealed shower system suitable for renovation?
Yes, but the wall normally needs to be opened so the valve and pipework can be installed and tested. It is easiest to add during a full bathroom renovation before waterproofing and tiling.
Is a 200 mm rainfall shower head large enough?
A 200 mm head offers broad overhead coverage without requiring the space of an oversized model. Suitability depends on shower dimensions, water pressure and personal preference.
Can the finish be matched with other bathroom fixtures?
Yes. The round design and neutral finish options can coordinate with many faucet and accessory collections. Confirm finish samples when exact color matching is important.
What should be checked before ordering?
Confirm the complete package contents, valve specification, connection size, pressure requirements, finish, installation depth, warranty and spare-parts support.
Does concealed installation make future maintenance difficult?
Routine components are often accessed from the trim side, but serviceability depends on the valve design and installation method. Confirm maintenance access with the supplier and installer before the wall is closed.
Conclusion
A concealed rainfall shower system is a strong choice for a clean, modern bathroom. The combination shown here—an approximately 200 mm round shower head, 400 mm wall arm and compact circular control—offers a balanced visual design with clearly defined installation dimensions. Good results depend on more than appearance: accurate rough-in planning, compatible water conditions, professional installation and access to technical support are equally important.
By reviewing both the visible components and the concealed valve requirements before purchase, homeowners, designers, contractors and hospitality buyers can select a system that fits the space and remains practical to install and maintain.